 Pin It
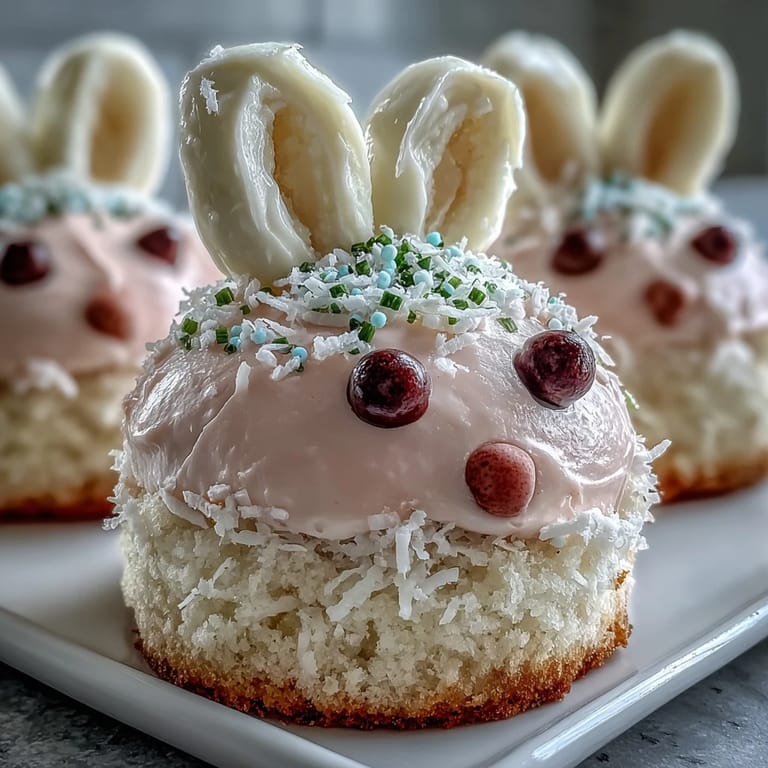
 My daughter came home from school with a drawing of a bunny wearing a party hat, declaring that Easter was her favorite holiday and asking if we could make something special together. I'd never shaped cakes into animals before, but watching her eyes light up at the idea of edible bunnies sitting on our kitchen counter made it impossible to say no. These mini cakes turned out to be easier than I expected, and by the time we'd finished decorating with candy eyes and marshmallow ears, she was already planning which friends would get which colored bunny.
I still laugh thinking about the Easter party where one little boy asked if the bunnies were real before he bit into his, then came back for seconds immediately after. That's when I knew these cakes had transcended the usual dessert category and become something that sparked joy and imagination at the table.
Ingredients
- All-purpose flour: The foundation that keeps these cakes tender and moist; sifting isn't strictly necessary here, but it does help prevent lumps from settling.
- Granulated sugar: Creates the sweetness and helps the batter rise; don't skip the creaming step with butter, as that's where the light texture begins.
- Unsalted butter: Softened butter incorporates air more easily, giving you that fluffy crumb that makes these cakes so irresistible.
- Whole milk: Adds moisture and richness; room temperature milk blends in more smoothly than cold.
- Large eggs: Bind everything together while adding structure; bringing them to room temperature helps them incorporate evenly.
- Baking powder: The leavening agent that gives you rise; make sure yours isn't expired, or your cakes will be dense.
- Salt: A tiny pinch that makes the vanilla flavor pop without tasting salty itself.
- Pure vanilla extract: Use the real thing if you can; it makes a noticeable difference in how the cakes taste.
- Powdered sugar: Sifting this before mixing prevents lumps in your buttercream, saving you frustration later.
- Mini marshmallows: When cut lengthwise, they become perfect bunny ears that stay soft and chewy.
- Pink candy-coated chocolates: These work perfectly for noses because they're small, colorful, and stick easily to buttercream.
- Mini chocolate chips: Use these for eyes because regular chips are too large and slide around on the frosting.
Tired of Takeout? 🥡
Get 10 meals you can make faster than delivery arrives. Seriously.
One email. No spam. Unsubscribe anytime.
Instructions
- Prepare your workspace:
- Preheat your oven to 350°F and grease your muffin tin well or line it with paper liners; this prevents any sticking that would ruin your bunny shapes. Get all your ingredients measured and ready before you start, because the mixing process moves quickly once you begin.
- Cream butter and sugar:
- Beat them together for about two to three minutes until the mixture looks pale and fluffy, like clouds; you should see the volume increase and the texture become airy. This step is crucial because you're incorporating air that will make your cakes light and tender.
- Add eggs one at a time:
- After each egg, mix well until it disappears into the batter before adding the next one; this prevents the mixture from looking curdled or separated. Take your time here because rushing leads to dense cakes.
- Stir in vanilla:
- A teaspoon of pure vanilla transforms ordinary batter into something that smells absolutely irresistible.
- Combine dry ingredients:
- Whisk together your flour, baking powder, and salt in a separate bowl; this distributes the leavening evenly so you get consistent rise.
- Alternate dry and wet ingredients:
- Add half the flour mixture, then half the milk, then repeat with the remaining portions, mixing just until combined after each addition. The key word is just; overmixing develops gluten and makes tough cakes.
- Fill muffin cups:
- Divide batter evenly so all your bunnies bake at the same rate; fill each cup about two-thirds full to leave room for rise without overflow.
- Bake until golden:
- Eighteen to twenty minutes is your target, and you'll know they're done when a toothpick inserted into the center comes out clean or with just a few moist crumbs. Let them cool completely on the rack before frosting; warm cakes tear easily.
- Make the buttercream:
- Beat softened butter until it's creamy and pale, then gradually add your sifted powdered sugar so it incorporates smoothly without clouds of powder escaping. Add milk and vanilla last, then beat until fluffy and spreadable.
- Tint your frosting:
- If you want colored bunnies, divide the buttercream and add a few drops of food coloring to each portion, mixing well until you achieve your desired shade. Less color goes a long way, so add it gradually.
- Frost each cake:
- Spread or pipe buttercream on top of each cooled cake, creating a small mound that the decorations will stick to. A spatula works fine, or use a piping bag if you want neater edges.
- Assemble your bunny faces:
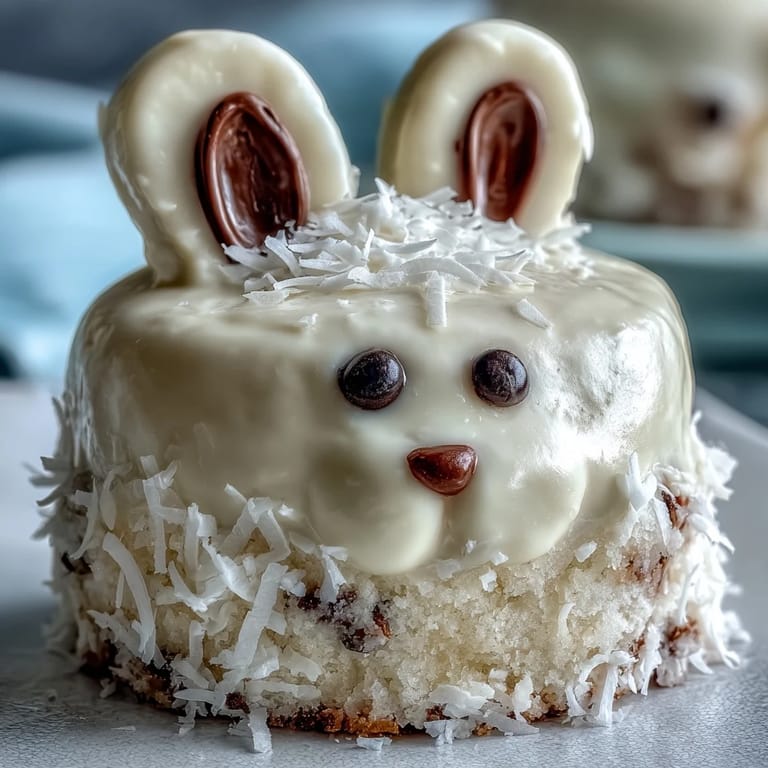
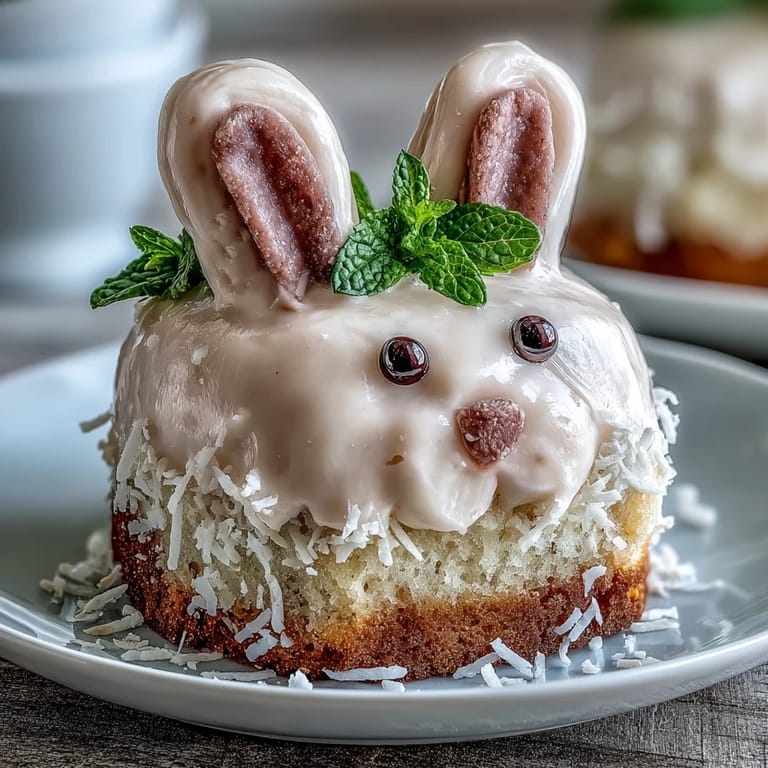
- Cut marshmallows in half lengthwise for ears, press them into the frosting at the top of each cake with a slight angle for personality. Add a pink candy for the nose, mini chocolate chips for eyes, and you've got an unmistakable bunny face.
- Create a festive display:
- Sprinkle shredded coconut or green sprinkles around the platter to look like grass, making your bunny parade even more charming and complete.
 Pin It
 There's something magical about transforming simple cake into characters that make children smile before they even take a bite. These bunnies became the centerpiece of our Easter table, not just because they tasted good, but because they carried the memory of making them together.
Why These Cakes Stay Moist
The combination of softened butter creamed with sugar and the addition of milk throughout the batter creates a tender crumb that stays soft for days. I've noticed that when you rush the creaming step or use cold ingredients, you lose that moisture no matter how fresh your eggs are. The vanilla also plays a subtle role in preserving moisture because it's an emulsifier that helps ingredients blend smoothly.
Decoration Ideas Beyond Basic Bunnies
While the classic bunny face is charming, I've discovered dozens of ways to personalize these cakes depending on what candy you have on hand. Once you master the basic shape, edible markers become your best friend for adding details like whiskers, different expressions, or even little bow ties. The real fun happens when you let creativity take over instead of following a single decorating template.
Storage and Make-Ahead Tips
I've learned through trial and error that these cakes actually taste better the next day once the flavors have settled slightly. The unfrosted cakes wrap well in plastic and stay fresh for three days at room temperature, or you can freeze them for up to a month. Frosted cakes keep for two days in an airtight container, making them perfect for baking the day before your Easter celebration and decorating the morning of the party.
- Freeze unfrosted cakes wrapped individually so you can thaw only what you need when you need it.
- Buttercream frosting can be made a full day ahead and kept in a sealed container in the refrigerator, then brought to room temperature before frosting.
- Decorated cakes are best enjoyed within a day, so plan your party timing to maximize that fresh, fluffy texture.
 Pin It
 Making these bunny cakes has become our Easter tradition, and every year the kids remind me weeks in advance that it's time to plan our decorating party. There's something special about food that brings people together and creates memories that last long after the last crumb is gone.
Recipe FAQs
- → What kind of flour is best for these cakes?
All-purpose flour works well to provide a tender yet sturdy crumb for the mini cakes.
- → How can I make the buttercream fluffy?
Beat softened butter until creamy before gradually adding powdered sugar and milk, continuing to whip until light and airy.
- → Can I substitute the milk for a dairy-free option?
Yes, plant-based milks like almond or oat milk can replace whole milk for dairy-free versions.
- → What is the best way to decorate the bunny cakes?
Use mini marshmallows for ears, candy-coated chocolates for noses, mini chocolate chips for eyes, and shredded coconut or sprinkles for grassy bases.
- → How do I know when the cakes are fully baked?
Insert a toothpick into the center; it should come out clean or with a few moist crumbs when done.
- → Can these cakes be made ahead of time?
Yes, bake and cool the cakes fully, then frost and decorate just before serving to maintain freshness.