 Pin It
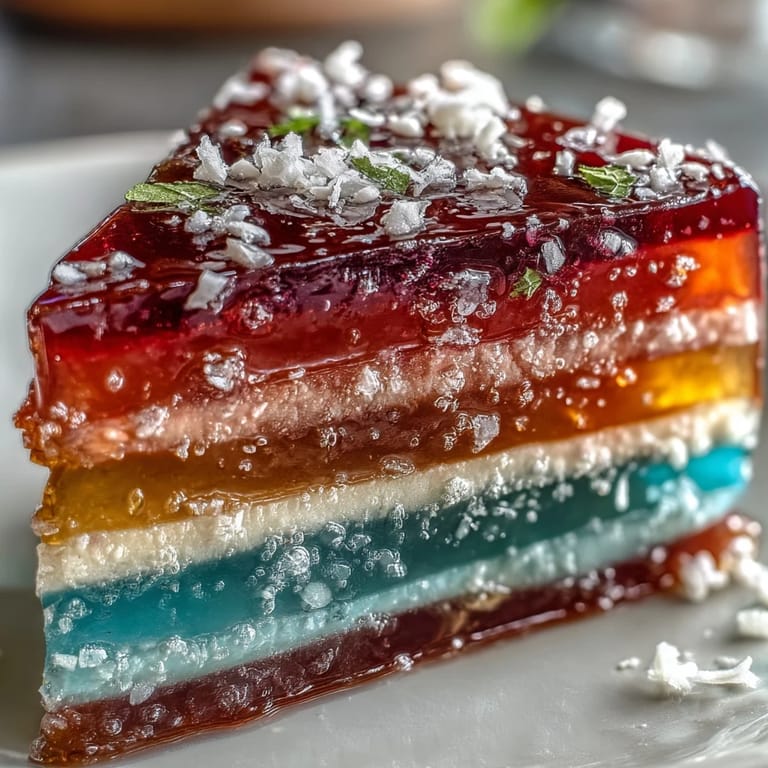
 The first time I made a Rainbow Jelly Cake, the kitchen looked like an artist’s palette exploded on the counter. I wasn’t setting out to impress—just curious if those bright, glassy layers would really work at home. Seconds after lifting the chilled jelly from its mold, I caught a whiff of coconut mingling with hints of vanilla, the kind of scent that floats through sticky Southeast Asian markets in summer. There’s a gentle pride in slicing through those stripes, each color tumbling out like a hidden surprise. No two attempts are ever the same—sometimes the green sets faster, sometimes the blue runs a little wild, and that’s part of the fun.
On a day when my favorite cousin visited with her kids, I decided to tackle this cake as an edible activity. We took turns swirling in food coloring, holding our breath every time we poured a new layer. The excited chatter would turn to hush as we peeked in on the fridge, waiting for each band to set. It became less about perfection and more about picking favorite colors, laughing when the layers wobbled. Even the youngest, with fingers sticky from sneaking extra coconut cream, declared it their new 'birthday cake.'
Ingredients
- Agar-agar powder: This plant-derived gelling agent is the secret to bouncy, sliceable layers—blooming it thoroughly ensures clear, even stripes.
- Water: Cold, filtered water helps dissolve the agar properly and keeps your layers pristine.
- Granulated sugar: Sweetens the jelly just enough, but don’t overdo it—less is more for a refreshing bite.
- Food colorings (red, orange, yellow, green, blue, purple): Use the tiniest drop to keep shades bright but natural; swirling in too much can make layers murky.
- Vanilla extract (optional): Adds a cozy aroma that softens the vibrancy of the jelly layers.
- Coconut cream: Rich and smooth, it brings tropical depth—shake the can before using to catch all the creamy goodness.
- Pinch of salt: Don’t skip it; this pinch tames the sweetness and sharpens the coconut’s flavor just right.
Tired of Takeout? 🥡
Get 10 meals you can make faster than delivery arrives. Seriously.
One email. No spam. Unsubscribe anytime.
Instructions
- Bloom the Agar:
- Combine agar-agar powder with cool water in a saucepan and stir constantly on medium heat until it's completely dissolved and clear—watch for the telltale thickening.
- Create Rainbow Jelly:
- Add granulated sugar and vanilla (if using), then split the liquid into six bowls and stir in food coloring, marveling as each hue develops before your eyes.
- Layer Up:
- Pour the first colored mixture into your mold, let it cool until just set, then gently repeat with each new color to build your stripes—feel that little snap as your spatula lifts and the previous layer shivers slightly.
- Make Coconut Cream Layer:
- Simmer agar-agar with coconut cream and water, whisking in sugar and salt till smooth and aromatic—don’t let it boil too fiercely.
- Finish and Chill:
- Carefully pour the warm coconut cream over set rainbow layers and cool to room temperature before refrigerating until fully firm.
- Unmold and Slice:
- Run a spatula or knife around the edge, invert onto a plate, and cut into neat slices or cubes—each piece reveals a full-spectrum surprise.
- Serve:
- Arrange on a chilled platter, serve straight from the fridge, and savor each creamy-jelly bite.
 Pin It
 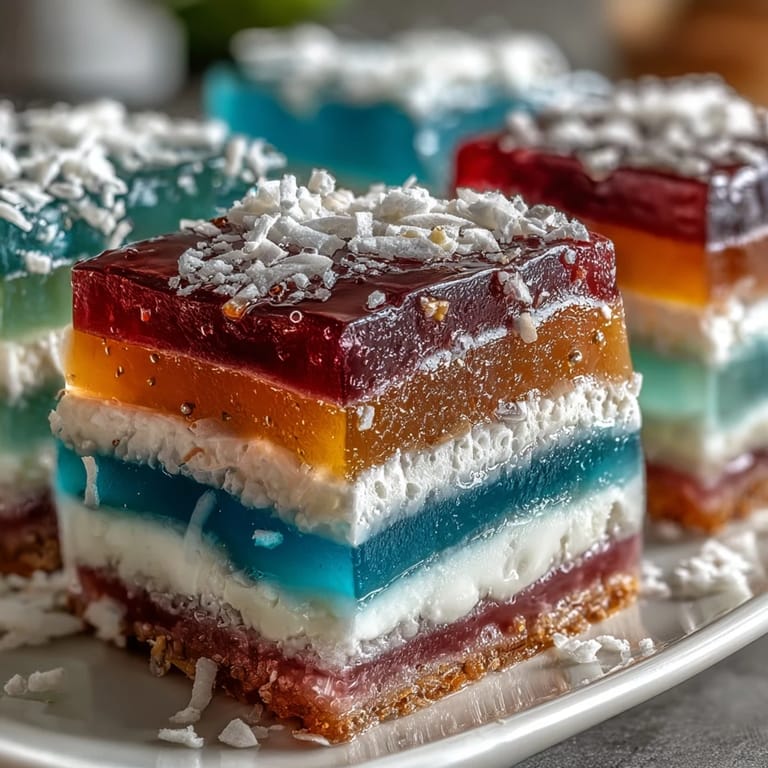 Pin It
 Slicing into this jelly cake for a backyard picnic, I caught the way the sunlight bounced off every layer. Suddenly, grown-ups circled for a peek, grabbing plates they hadn’t even planned to use. It’s the sort of treat that stops time—everyone wants just one more bright, wobbly slice.
How to Make Your Layers Even Every Time
I've learned to pour each layer by using a ladle or cup with a spout, which gives more control than pouring straight from a bowl. A steady hand, patience, and checking the layer’s surface by lightly tapping tell you when to add the next color. The good news: even if one stripe is thicker or thinner, the cake remains dazzling and delicious.
Troubleshooting Wobbly Layers
If your jelly separates or slumps to one side, it could be the fridge is too cold, or a layer was poured while still too warm. Let each hue cool long enough that it yields slightly to your finger but doesn’t stick. Don’t panic if the surface ripples; those quirks make every cake uniquely yours.
Creative Variations and Substitutions
Pandan or rose extract mixed into your layers shifts both fragrance and color, adding a homey Southeast Asian touch. Swap some coconut cream for soymilk or almond milk for a lighter profile and a different kind of creaminess. If you’re short on time or patience, make just three bands—nobody will mind a ‘mini rainbow’ slice!
- Use a silicone mold to skip the stress of unmolding.
- Add soft tropical fruit (like lychee or jackfruit) between layers for bursts of flavor.
- Store leftovers in a sealed container, and serve within three days for best texture.
 Pin It
  Pin It
 Rainbow Jelly Cake always brings out smiles—no matter if your stripes wobble or run together. Sharing it feels like serving up little slices of cheer, one shimmering color at a time.
Recipe FAQs
- → How do I ensure agar-agar fully dissolves?
Bring the agar-agar and water to a rolling boil over medium heat and stir constantly for about 2–3 minutes until completely dissolved. Skipping the full boil can leave grainy bits and prevent proper setting.
- → How long should each jelly layer set before adding the next?
Allow each layer to cool and reach a gelatinous but still tacky state, about 5–8 minutes at room temperature for shallow molds. If too soft, colors will blend; if too firm, adhesion between layers can weaken.
- → Can I use natural colorings without affecting texture?
Yes. Natural colors from fruit and vegetable juices or concentrates work fine but may slightly alter flavor or acidity. Test a small batch first, as some natural dyes can affect setting strength and may require minor agar adjustments.
- → How do I prevent the coconut layer from breaking the jelly layers?
Cool the coconut cream mixture briefly so it’s warm rather than hot before pouring. Pour slowly over the back of a spoon or an offset spatula to disperse the flow and avoid disturbing the top jelly layer.
- → What’s the best way to unmold without cracking the layers?
Loosen edges with a thin knife, briefly dip the mold base in warm water for a few seconds to soften the exterior, then invert onto a plate. Handle gently and chill thoroughly before slicing for clean edges.
- → How long does this keep and how should it be stored?
Cover and refrigerate for up to 3 days. Keep chilled to maintain texture and prevent coconut cream separation. Allow to sit a few minutes at room temperature before serving if very firm.