 Pin It
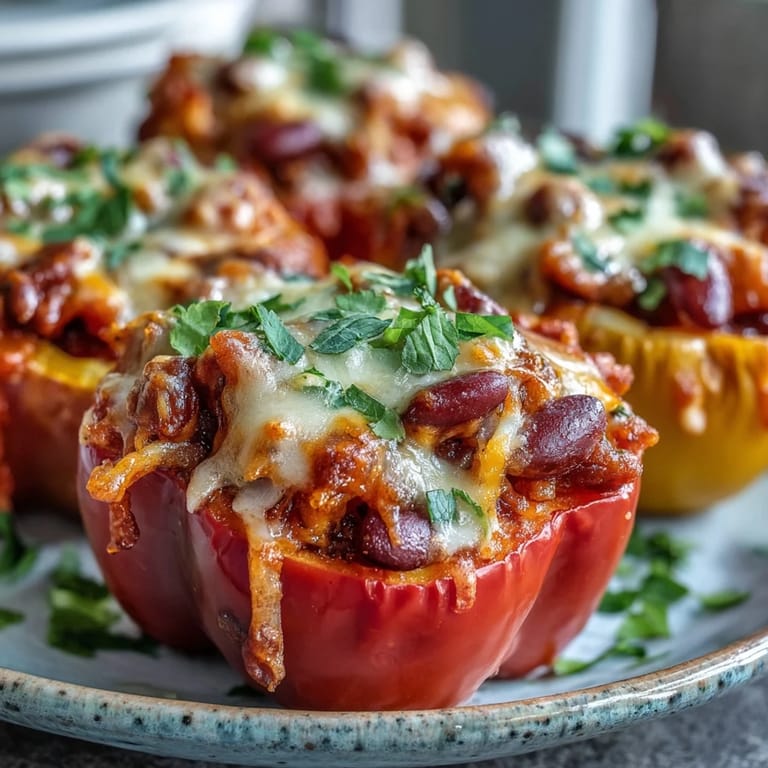
 My kitchen was chaos that Tuesday evening—leftovers scattered across the counter, a half-empty bag of elbow pasta, and three bell peppers sitting in my crisper drawer that needed rescuing. I'd been craving chili, but pasta too, and somehow standing there at 5 p.m. with hungry people arriving in an hour, I thought: why choose? That night taught me something simple: the best meals come from refusing to pick sides.
I made this for my sister's family one Sunday, and her kids—notoriously picky about vegetables—actually ate the peppers instead of pushing them to the edge of their plates. Watching them dig in without complaint while the cheese was still bubbling felt like winning a small, delicious victory in the ongoing battle of feeding people you love.
Ingredients
- 4 large bell peppers: Choose different colors if you want the final dish to look vibrant, but any color works equally well, and the parboiling step keeps them from getting mushy.
- 200 g lean ground beef or turkey: Ground turkey keeps this lighter, but beef brings a deeper, richer flavor that makes the whole thing feel more indulgent.
- 1 small onion and 2 cloves garlic: These are your flavor foundation—don't skip the mincing step or you'll get uneven texture bites throughout.
- 1 tablespoon olive oil: Use something you actually like tasting, not the cheapest bottle, because you'll notice the difference here.
- Chili powder, cumin, and smoked paprika: These three create the warm backbone that makes people ask what's in this, even if they don't normally love spiced food.
- 400 g canned diced tomatoes and 200 g kidney beans: Drain them well or your filling becomes watery and the peppers sit in a puddle instead of nestling in a cozy filling.
- 80 g elbow macaroni: Whole wheat adds nuttiness and keeps you fuller longer, but regular pasta works beautifully too.
- 250 ml broth: Low-sodium lets you control the salt level and prevents the dish from tasting like a salt lick by the end.
- 80 g sharp cheddar cheese: Sharp matters here because mild cheddar gets lost under all these other bold flavors.
Tired of Takeout? 🥡
Get 10 meals you can make faster than delivery arrives. Seriously.
One email. No spam. Unsubscribe anytime.
Instructions
- Set your stage:
- Preheat the oven to 200°C (400°F) and grease your baking dish—this takes thirty seconds and prevents the whole operation from falling apart later.
- Soften the peppers:
- Boil those pepper cups for 4 minutes exactly; you're not cooking them through, just starting the process so they finish tender instead of staying woody and unyielding. Drain them and arrange cut-side up in your prepared dish like little edible bowls waiting to be filled.
- Build your flavor base:
- Heat oil in a large skillet and cook onion until it loses its sharp bite and turns translucent, about 2 to 3 minutes, then add garlic and listen for that immediate fragrance that tells you something good is happening.
- Brown your meat:
- Let the ground beef or turkey break apart as it hits the hot pan, stirring occasionally until no pink remains, which takes about 4 to 5 minutes. If there's excessive fat, tip it out, but don't obsess—you need some for flavor.
- Wake up the spices:
- Add all your dried seasonings and let them toast in the heat for just a minute before adding the tomatoes and beans; this step transforms powder into flavor. Stir everything together and let it meld for 2 minutes so nothing tastes raw or separated.
- Cook the pasta in the chili:
- Pour in the pasta and broth, bring it to a simmer, and let it bubble away uncovered for 7 to 9 minutes until the pasta is nearly tender and the liquid mostly absorbed. Taste it here and adjust the salt and spices—this is your last chance before it goes into the peppers.
- Fill and top:
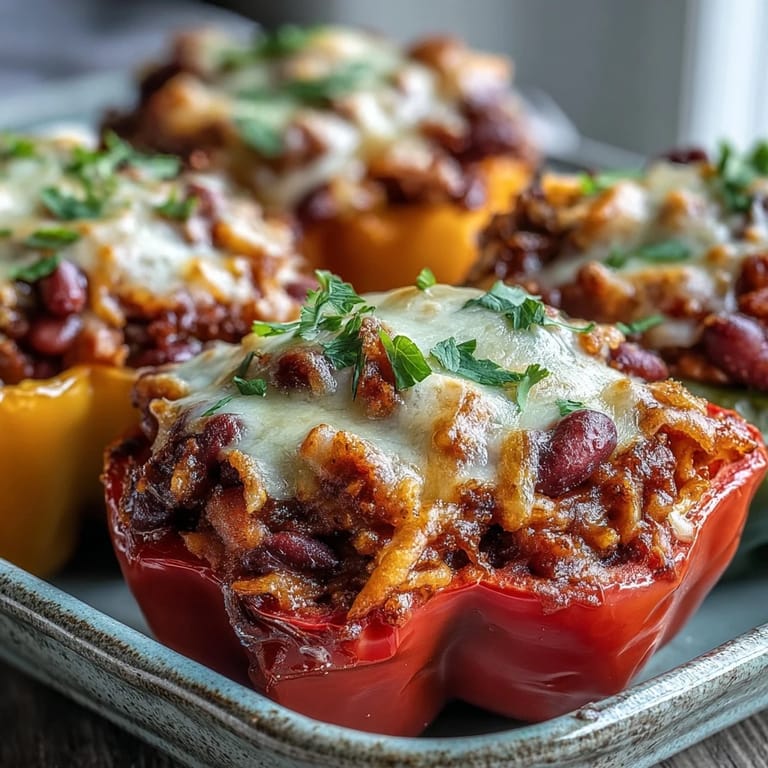
- Spoon the chili mac into each pepper cavity, dividing it evenly, then scatter cheddar cheese over each one generously, letting some fall onto the sides.
- Bake until golden:
- Cover loosely with foil and bake for 20 minutes so the filling heats through without drying out, then remove the foil and give it 8 to 10 more minutes until the cheese browns and bubbles around the edges. The peppers should be tender enough to cut with your fork, not resistant and firm.
- Finish and serve:
- Scatter cilantro or parsley on top if you have it—it adds brightness that cuts through the richness. Serve hot, while the cheese is still melting.
 Pin It
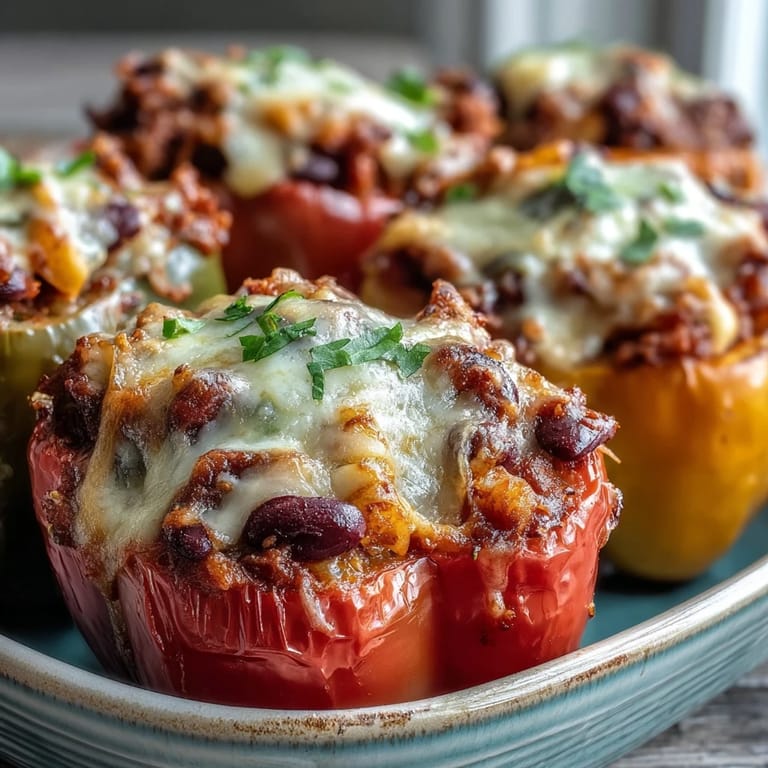
 There's something deeply satisfying about pulling this from the oven, watching the cheese cascade down the pepper sides in golden rivers, and knowing you've created something that's genuinely good for people and makes them happy at the same time. That's when food becomes more than sustenance.
Why This Meal Works So Well
The magic here is in the simplicity of the concept—you're not doing anything technically difficult, but the combination feels thoughtful and intentional. One dish gives you vegetables, protein, carbs, and cheese without requiring anyone to construct their own plate or feel like something's missing. It's the kind of meal that makes people ask for seconds not because they're being polite, but because the flavors actually convinced them.
Swaps and Variations That Actually Work
I've made this with ground turkey when I wanted lighter, with plant-based crumbles for a vegetarian friend, and once with black beans because someone had a kidney bean aversion. Each version tastes slightly different but equally satisfying, which is the sign of a truly flexible recipe. The beauty is that you can adjust the spice level by adding jalapeños, switch up the cheese for something smokier, or even use gluten-free pasta without anybody noticing the difference once it's all baked together.
Making Ahead and Storage
You can assemble these peppers up to 8 hours before baking—just cover them tightly with plastic wrap and refrigerate, then add about 5 extra minutes to the baking time since you're starting from cold. Leftovers keep in the fridge for 3 days and reheat beautifully in a 180°C oven covered with foil until warmed through, or in the microwave if you're in a hurry and don't mind slightly less crispy cheese.
- Make the chili mac filling the night before and store it separately from the peppers, then combine and bake fresh for the best results.
- Freeze unbaked stuffed peppers for up to 3 months—just thaw overnight in the fridge before baking, or add extra time if going straight from freezer to oven.
- Individual peppers can be frozen after cooking too, wrapped well in foil, making it easy to reheat just what you need on a busy weeknight.
 Pin It
 This dish proves that comfort food doesn't require complexity, just thoughtful ingredients brought together in ways that make sense. Make it this week and watch what happens.
Recipe FAQs
- → Can I make these stuffed peppers ahead of time?
Yes, you can assemble the peppers up to 24 hours in advance and refrigerate before baking. Add an extra 5-10 minutes to the baking time if baking cold from the refrigerator.
- → What other meats work well in this dish?
Ground turkey, chicken, or even plant-based crumbles make excellent substitutions for the beef. Just adjust cooking time slightly as leaner meats cook faster.
- → Can I freeze stuffed peppers?
Absolutely. Wrap each stuffed pepper individually in plastic wrap and foil, then freeze for up to 3 months. Thaw overnight in the refrigerator before reheating in a 350°F oven for 20-25 minutes.
- → How do I know when the peppers are done?
The peppers should be tender when pierced with a fork, and the cheese should be melted and lightly golden. If the peppers need more time but cheese is browning too quickly, cover loosely with foil.
- → Can I use different types of peppers?
Large poblano peppers work wonderfully for a spicier version. Just adjust baking time slightly as poblanos may cook faster than thick-walled bell peppers.
- → What can I serve with stuffed peppers?
A simple green salad with vinaigrette, crusty bread, or steamed vegetables like broccoli or green beans complement the rich, cheesy filling perfectly.