 Pin It
 Last summer, my friend Nisa taught me how to make these rolls in her tiny Bangkok kitchen, where every surface was covered with little bowls of herbs and the air smelled like garlic and frying beef. I was terrified of ripping the delicate rice paper, but she showed me this gentle rolling motion that felt like folding a letter. We ate them sitting on her balcony floor while a tropical storm rolled in, dipping each roll into that sharp, bright sauce between bursts of laughter and rain.
I made these for my sister's birthday dinner last month, and my brother-in-law who claims to hate fresh herbs ate four in a row without saying a word. Later he admitted he'd been picking around the mint for years and had simply never had it balanced properly with enough acid and heat. Now he asks when I'm making them again every single time he sees me.
Ingredients
- Ground beef: The 85-90% lean ratio gives you enough fat to keep the filling juicy without making the rice paper soggy
- Thai basil: Dont even try to substitute regular basil here, that peppery anise flavor is the whole point of the dish
- Rice paper wrappers: Work with them gently and confidently, they can sense your fear and tear accordingly
- Fresh lime juice: Added at the very end to brighten the cooked beef without cooking away the fresh acid
- Fish sauce: The salt backbone of both the filling and dipping sauce, start with less if you're new to it
Tired of Takeout? 🥡
Get 10 meals you can make faster than delivery arrives. Seriously.
One email. No spam. Unsubscribe anytime.
Instructions
- Mix the sauce seasoning first:
- Whisk together soy sauce, fish sauce, oyster sauce, dark soy sauce if using, and sugar until everything dissolves into this glossy amber pool. Add a splash of water if it looks too thick and set it aside while you prep everything else.
- Build your flavor base:
- Heat that tablespoon of oil in your wok or big skillet until it shimmers, then toss in garlic and shallot. Watch them closely, 30 to 45 seconds is all it takes to hit fragrant without crossing into burned territory.
- Add the heat and aromatics:
- Throw in those minced chilies and the white parts of your green onions. Give them 20 to 30 seconds just to wake up their oils and perfume the whole kitchen.
- Brown the beef properly:
- Add your ground beef and use your spatula to break it into small crumbles as it cooks. Let it go 4 to 6 minutes until mostly browned with some nice golden spots, stirring frequently so it cooks evenly.
- Soften the peppers:
- Toss in the diced red bell pepper and let it cook for 2 to 3 minutes. You want it to lose that raw crunch but still keep some texture.
- Bring it all together:
- Pour in that sauce seasoning you made earlier and toss everything together. Let it bubble for 2 to 3 minutes until the sauce reduces slightly and clings to the meat like a glaze.
- Finish with fresh herbs:
- Crank the heat down to low and scatter in the chopped Thai basil and green onion tops. Toss just until the basil wilts, about 30 to 45 seconds, then turn off the heat.
- The final bright note:
- Stir in the fresh lime juice, then let the whole mixture cool to room temperature while you prep your rolling station. Warm beef splits rice paper, I learned this the frustrating way.
- Make the dipping sauce:
- Whisk fish sauce, lime juice, sugar, and warm water until the sugar dissolves completely. Stir in garlic, chilies, carrot, and herbs, then taste and adjust until it hits that perfect balance where salty, sour, sweet, and spicy all show up to work together.
- Set up your station:
- Fill a wide shallow dish with warm water and clear a clean board or plate for rolling. Have all your vegetables, herbs, and cooled beef within arm's reach because wet rice paper waits for no one.
- Soften the wrappers:
- Dip one rice paper in warm water for 3 to 5 seconds, turning it to coat completely. Lay it on your board and trust me, it keeps softening as you work.
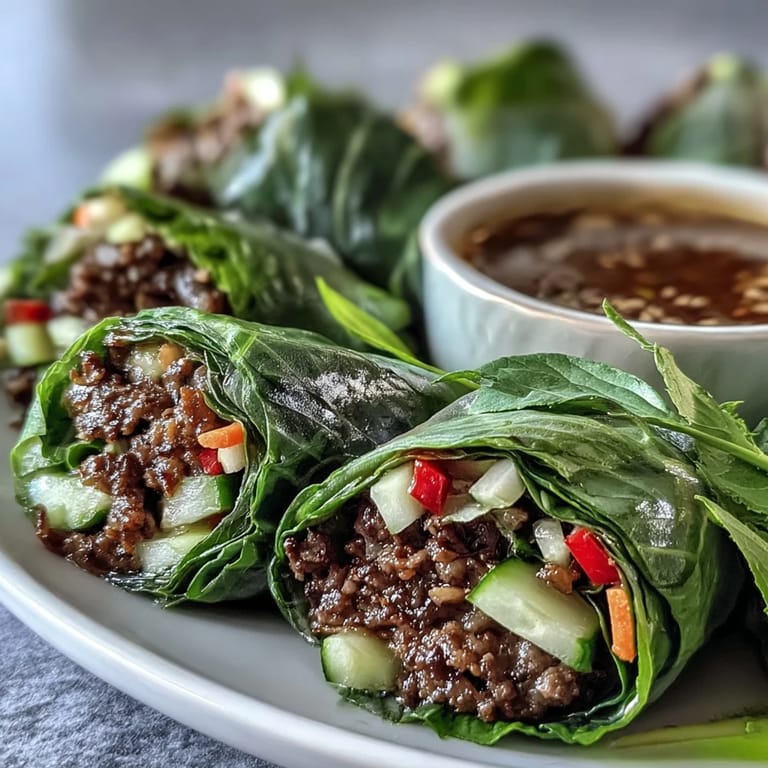
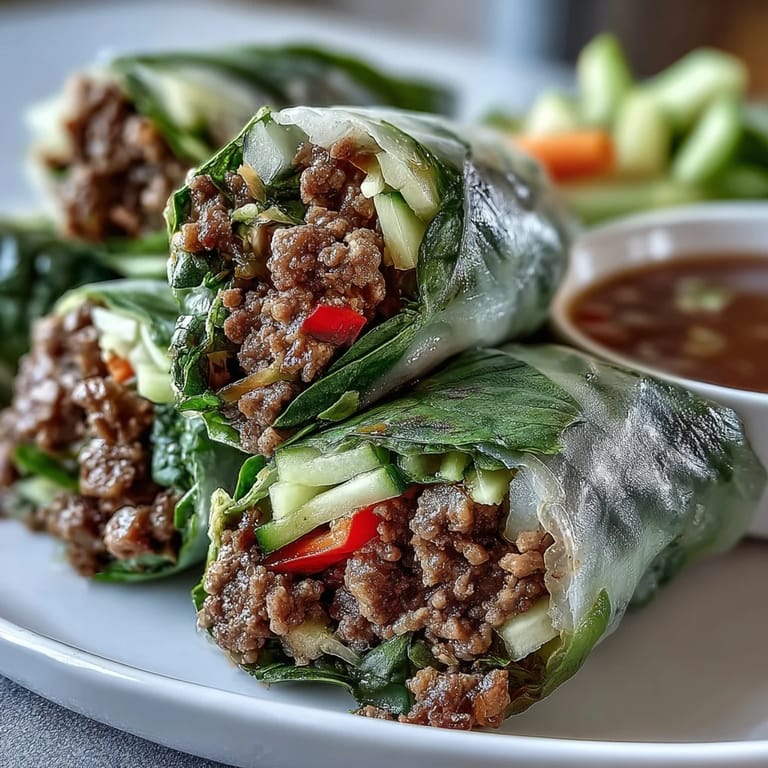
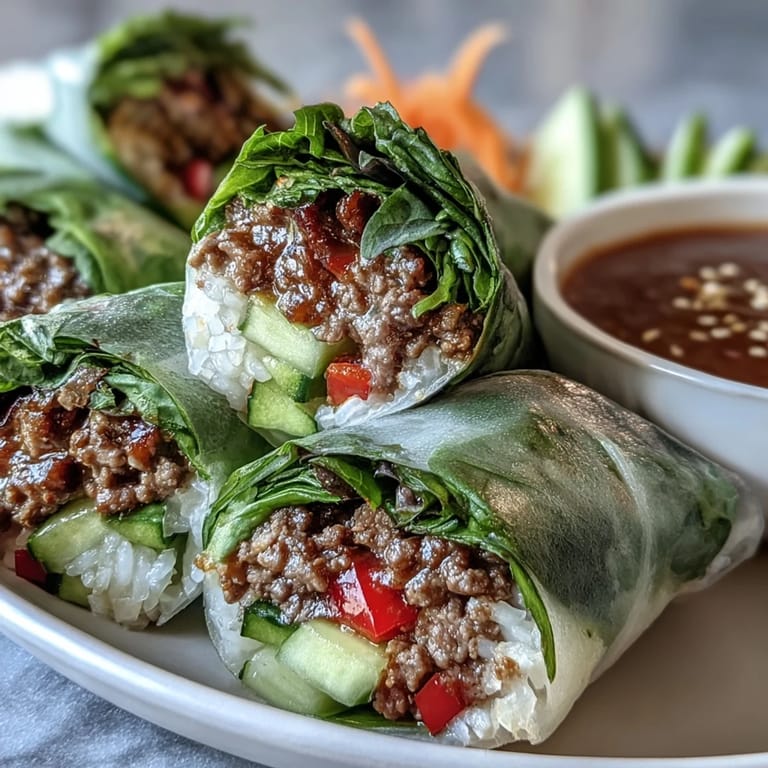
- Layer your filling:
- Pile 2 to 3 tablespoons of cooled rice or noodles on the bottom third, followed by a few spoonfuls of beef. Add strips of cucumber and carrot, some lettuce, and a generous handful of fresh herbs.
- Roll it up tight:
- Fold the bottom edge over your filling, tuck in the sides like you're wrapping a present, then roll forward into a tight cylinder. Place seam side down and repeat until you've used everything.
 Pin It
 My niece helped me roll a batch last weekend and declared herself a master after making exactly three. Her rolls were lopsided and falling apart, but she was so proud that we served them anyway, and honestly they tasted just as good. Sometimes the imperfect ones are the ones you remember.
Getting Ahead
You can cook the beef filling up to a day ahead and store it in the refrigerator. The flavors actually develop and get better overnight, so this is one of those rare recipes where meal prep works in your favor. Just let it come to room temperature before you start rolling or you will fight with the wrappers and lose.
Herb Substitutions
Real Thai basil has that distinct peppery licorice flavor that makes this dish sing, but I have used Italian basil mixed with a few fresh mint leaves in a pinch. It is not the same, exactly, but you still get something fresh and herbal that balances the rich beef. Do not skip the fresh herbs entirely, that is where all the brightness lives.
Rolling Technique Secrets
The trick is not to overstuff your rolls, because no one enjoys a burst rice paper situation. Keep your fillings in a tight log shape toward the bottom third of the wrapper and fold snugly but gently. If your wrapper feels too sticky, lightly oil your work surface with neutral oil and it will slide around instead of grabbing back.
- Work with one wrapper at a time until you get the rhythm down
- Keep finished rolls slightly separated so they do not stick together
- Serve them within a few hours for the best texture and flavor
 Pin It
 There is something deeply satisfying about eating food you have assembled with your own hands, each roll a little package of care. I hope these become part of your table, whether for a quiet lunch or a crowded gathering of people you love.
Recipe FAQs
- → Can I prepare the beef filling ahead of time?
Yes, cook and cool the beef mixture up to 24 hours in advance. Store in an airtight container in the refrigerator. Bring to room temperature before rolling for easier handling.
- → What's the best way to prevent rice paper from tearing?
Use warm (not hot) water and dip wrappers briefly for 3-5 seconds. Don't oversoak—they continue softening as you work. Place on a lightly oiled surface to prevent sticking.
- → Can I make these gluten-free?
Absolutely. Use gluten-free soy sauce (tamari) and verify your oyster sauce is gluten-free. Most rice paper wrappers are naturally gluten-free, but check labels to be certain.
- → How long do rolled rolls stay fresh?
Best served immediately. If needed, cover with damp towel and plastic wrap; refrigerate up to 2-3 hours. Let sit at room temperature 10-15 minutes before serving—the wrappers become tough when cold.
- → Can I substitute the protein?
Ground turkey, chicken, or extra-lean beef work well. For vegetarian versions, use crumbled tofu or seasoned mushrooms. Adjust cooking times accordingly as lean meats cook faster.
- → What if I can't find Thai basil?
Italian basil combined with mint makes a good substitute. Thai basil has distinct anise notes, so the combination helps approximate that flavor profile. Fresh mint alone also works in a pinch.