 Pin It
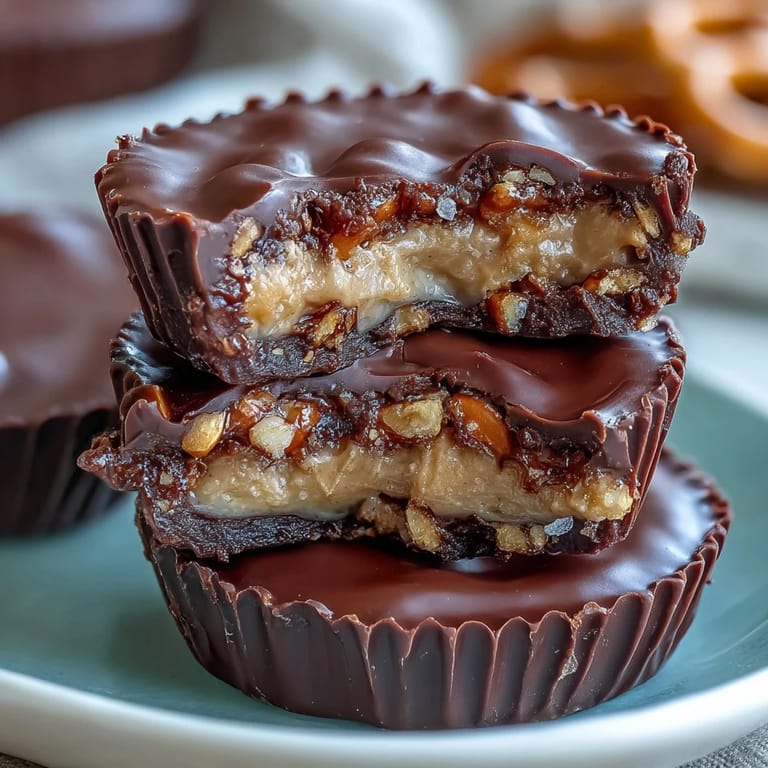
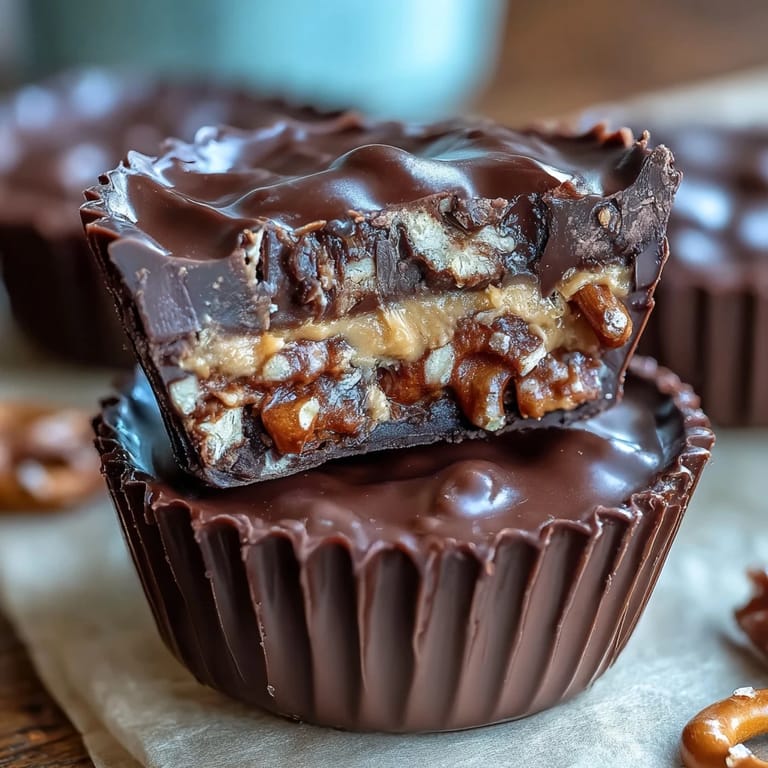
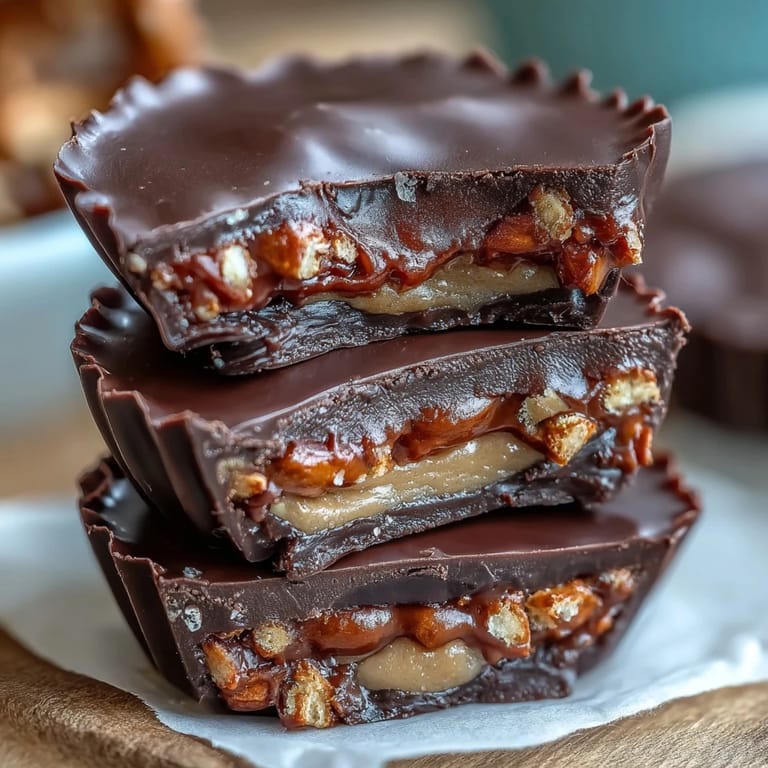
 My coworker Sarah brought these to the office one Tuesday, and I watched three people stop mid-conversation to ask for the recipe. There's something about the combination of salty pretzel crunch meeting smooth chocolate that just works—it feels indulgent without being fussy. I made my first batch that weekend, and the smell of melting chocolate mixed with the nuttiness of peanut butter had my kitchen feeling like a professional candy shop. These homemade cups knocked the store-bought versions completely out of my rotation.
I made a double batch during a snowstorm when my sister got stuck at our place, and we sat at the kitchen table with hot coffee, passing around finished cups while we waited for the next batch to chill. She kept sneaking extra chocolate from the bowl, and by the end we were laughing about how the cleanup was worth it just for those few quiet hours together. That's when I realized these aren't just candy—they're an excuse to slow down.
Ingredients
- Mini salted pretzels (1 cup crushed): Don't skip the salt—it's the entire point. Buy them already in a bag if you can, which saves crushing time and gives you more pretzel pieces of varying sizes for better texture.
- Unsalted butter (2 tbsp melted): The fat helps everything bind together and keeps your base from tasting too dry. Melting it before mixing makes coating the pretzels actually effortless.
- Creamy peanut butter (3/4 cup): Use the good stuff here because you can actually taste it. Natural peanut butter works beautifully if you stir it well first to combine any separated oil.
- Powdered sugar (1/4 cup): This sweetens the filling without making it grainy. It dissolves instantly when mixed with the peanut butter, creating that silky texture.
- Vanilla extract (1/4 tsp): A small amount lifts the peanut butter flavor without screaming vanilla. Don't overdo it or it'll taste like a cookie.
- Salt (pinch): This feels redundant until you taste the difference—it makes the peanut butter filling taste more intentional and rounds out all the flavors.
- Semi-sweet chocolate chips (1 1/4 cups): These melt beautifully and strike the right balance between richness and sweetness. If you prefer dark chocolate, use that instead for a more sophisticated finish.
- Coconut oil or butter (1 tbsp): This thins the melted chocolate just enough to coat smoothly without being greasy. Coconut oil keeps things dairy-free if that matters to you; butter works fine too.
Tired of Takeout? 🥡
Get 10 meals you can make faster than delivery arrives. Seriously.
One email. No spam. Unsubscribe anytime.
Instructions
- Set up your workspace:
- Line your muffin tin with paper liners so you don't spend 20 minutes peeling chocolate later. Everything tastes better when you don't have to fight to remove it.
- Build the pretzel base:
- Crush your pretzels right into the bowl—not too fine, you want visible chunks and texture. Mix them with melted butter until every piece looks glossy, then press about a tablespoon firmly into each liner so you have a sturdy foundation.
- Make the filling:
- In a clean bowl, combine peanut butter, powdered sugar, vanilla, and that pinch of salt. The mixture should feel creamy and spreadable—this is where the magic lives.
- Spread gently:
- Place a tablespoon of filling on each pretzel base and spread it out with the back of your spoon or a small offset spatula. Don't be precious about it; rustic looks homemade.
- Melt the chocolate carefully:
- In your microwave-safe bowl, heat the chocolate chips and coconut oil in 30-second bursts, stirring between each one. This prevents seizing and keeps your chocolate smooth rather than chunky and grainy.
- Top with chocolate:
- Spoon melted chocolate over each cup and smooth it with the back of a spoon. You want enough to coat everything but not so much that it drowns the filling.
- Chill and finish:
- Pop the whole tin in the refrigerator for at least 30 minutes until everything feels firm and set. Once they're solid, pop them out of the liners and into an airtight container for storage.
 Pin It
 My neighbor knocked on my door one evening asking if I could teach her how to make these because her kids kept requesting them instead of store-bought candy. We made them together in her kitchen, and watching her face light up when she tasted the finished product made me remember why I love cooking—it's not about being perfect, it's about creating something that brings people genuine joy.
The Sweet-Salty Science
Salt and sweetness are actually best friends in dessert, but most people don't realize how much of a difference a small amount makes. The pinch in the peanut butter filling isn't there to make them taste salty—it's there to amplify every other flavor and make the chocolate feel richer. It's the kind of kitchen wisdom that sounds small until you taste two batches side by side.
Chocolate Selection Matters
I've made these with everything from fancy artisanal chocolate to basic chips from the bulk bin, and honestly, they're all good. But here's what I learned: semi-sweet chocolate is the Goldilocks choice because it doesn't overpower the peanut butter, and it sets cleanly without being too thick. Dark chocolate pushes things toward sophisticated, while milk chocolate tilts everything toward pure indulgence.
Customization and Storage
These cups are forgiving enough to adapt to what you have on hand and your flavor preferences. The basic structure stays the same, but you can play with the details to make them yours. Store them in an airtight container in the refrigerator where they'll keep for up to two weeks, though they rarely last that long in my house.
- Sprinkle a few crushed pretzels on top of the chocolate layer right before chilling for extra textural crunch and a visual reminder of what's inside.
- Swap in almond butter or sunflower seed butter if you want something different from classic peanut butter.
- Make a double batch and keep extras in the freezer, where they actually taste even better because the chocolate snaps cleanly when you bite into it.
 Pin It
 These cups have become my answer to the question what do you bring to a gathering or what should I make for someone who's hard to shop for. They're homemade proof that you care, packaged in a way that feels intentional.
Recipe FAQs
- → How do I achieve a crunchy pretzel base?
Crush mini salted pretzels finely and mix with melted butter to create a firm, crunchy base when pressed into liners.
- → What is the best way to melt chocolate for toppings?
Melt chocolate chips with coconut oil or butter in 30-second microwave intervals, stirring thoroughly for smooth consistency.
- → Can I make this treat gluten-free?
Yes, substitute regular pretzels with gluten-free varieties to accommodate gluten sensitivities.
- → How long should these cups chill before serving?
Chill for at least 30 minutes to ensure the layers set firmly and hold their shape.
- → Any tips for enhancing texture and flavor?
Sprinkle crushed pretzels atop the chocolate before chilling for extra crunch, or use dark chocolate for richer taste.