 Pin It
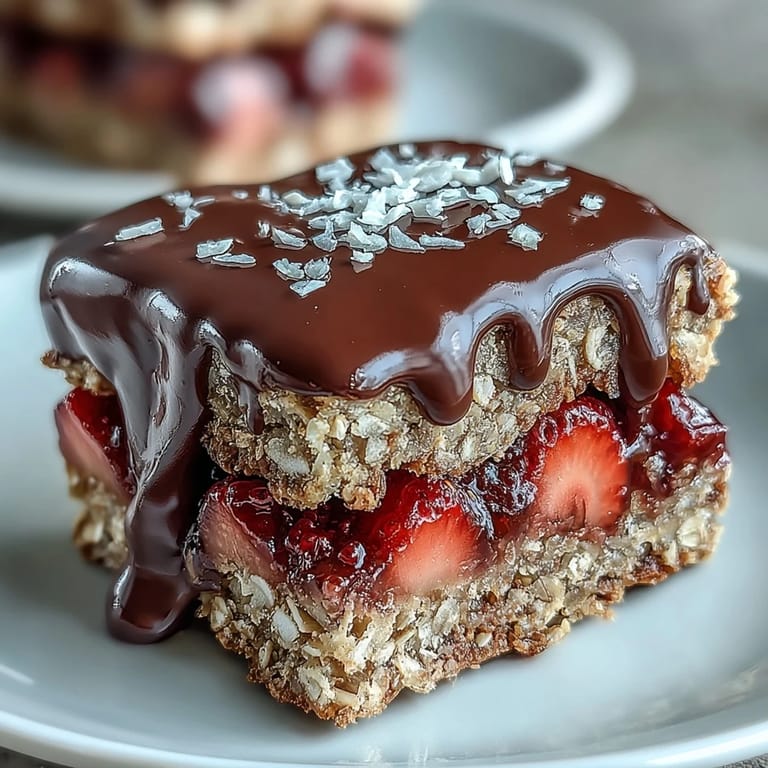
 My neighbor showed up at my door one afternoon with a tin of these bars, still slightly warm from her kitchen, and I understood immediately why she couldn't stop making them. The combination of chewy oats, tart-sweet strawberry, and that satisfying chocolate snap felt like someone had figured out the exact formula for comfort. I've been making them ever since, usually on lazy Sundays when I want something that looks fancy but requires almost no actual baking skills. They've become my go-to gift, the kind of treat people ask about before they've even finished eating one.
I made these for my partner's book club last month, and watching people's eyes light up when they bit into them made me realize this recipe does something special—it bridges the gap between indulgent and wholesome, which is exactly what everyone's looking for these days.
Ingredients
- Old-fashioned rolled oats (2 cups): The foundation of these bars, offering chewy texture and nuttiness that holds everything together without flour.
- Almond flour (1 cup): Adds richness and helps bind the mixture while keeping things naturally gluten-free if that matters to you.
- Creamy peanut butter or almond butter (1/2 cup): This is your binding agent and flavor anchor—don't skip it, and make sure it's natural butter without added oils for the best consistency.
- Pure maple syrup or honey (1/4 cup): The sweetness that ties everything together without making these taste like candy, though you can adjust to your preference.
- Coconut oil, melted (1/4 cup): Keeps the bars from being too dense and helps with that perfect press-and-hold texture.
- Vanilla extract (1/2 tsp): A small amount that somehow elevates everything without announcing itself.
- Salt (1/4 tsp): The quiet hero that makes every other flavor pop.
- Strawberry preserves or jam (3/4 cup): Look for low-sugar versions if you can—the fruit flavor matters more than syrupy sweetness here.
- Freeze-dried strawberries, crushed (1/2 cup): These add brightness and prevent the middle layer from being too wet, a trick I learned after my first batch was soupy.
- Semi-sweet or dark chocolate, chopped (6 oz): Quality matters here since it's the last thing your tongue touches—choose something you'd actually eat on its own.
- Coconut oil (1 tbsp): Thinned the chocolate just enough to drizzle without clumping.
Tired of Takeout? 🥡
Get 10 meals you can make faster than delivery arrives. Seriously.
One email. No spam. Unsubscribe anytime.
Instructions
- Prep your pan with patience:
- Line an 8x8-inch square pan with parchment paper, making sure to leave enough overhang on two sides so you can lift the whole thing out later. This step saves you from the frustration of trying to chisel bars out of a stubborn pan.
- Combine the oat base:
- Toss the oats, almond flour, peanut butter, maple syrup, melted coconut oil, vanilla, and salt into a large bowl and mix until everything is sticky and well incorporated. If it feels too dry, add another tablespoon of coconut oil—the mixture should feel like it's holding together but still crumbly enough to press.
- Layer one: Press the foundation:
- Take about two-thirds of your oat mixture and press it firmly and evenly into the prepared pan, using the bottom of a measuring cup to get it smooth and tight. Use your reserved third for later.
- Layer two: Spread the strawberry:
- Spread the strawberry preserves evenly over the oat base in a thin layer, then scatter your crushed freeze-dried strawberries on top to add texture and prevent sogginess.
- Layer three: Top it off:
- Crumble the remaining oat mixture and gently press it over the strawberry layer until everything is covered and level. Don't compress it too hard—you want it to stay a little tender.
- Melt the chocolate gently:
- Place your chopped chocolate and coconut oil in a microwave-safe bowl and heat in 30-second intervals, stirring between each one, until perfectly smooth. This prevents the chocolate from seizing up and burning.
- Add the chocolate finish:
- Drizzle the melted chocolate over the bars in whatever pattern calls to you, or wait until they're cut and dip each one individually for a more polished look.
- Chill and set:
- Refrigerate for at least 2 hours until everything is firm enough to cut cleanly. I usually leave mine overnight because I like the chocolate extra snappy.
- Release and cut:
- Lift the whole slab out of the pan using the parchment overhang and place on a cutting board, then slice into 12 even bars with a sharp knife, wiping between cuts for clean edges.
 Pin It
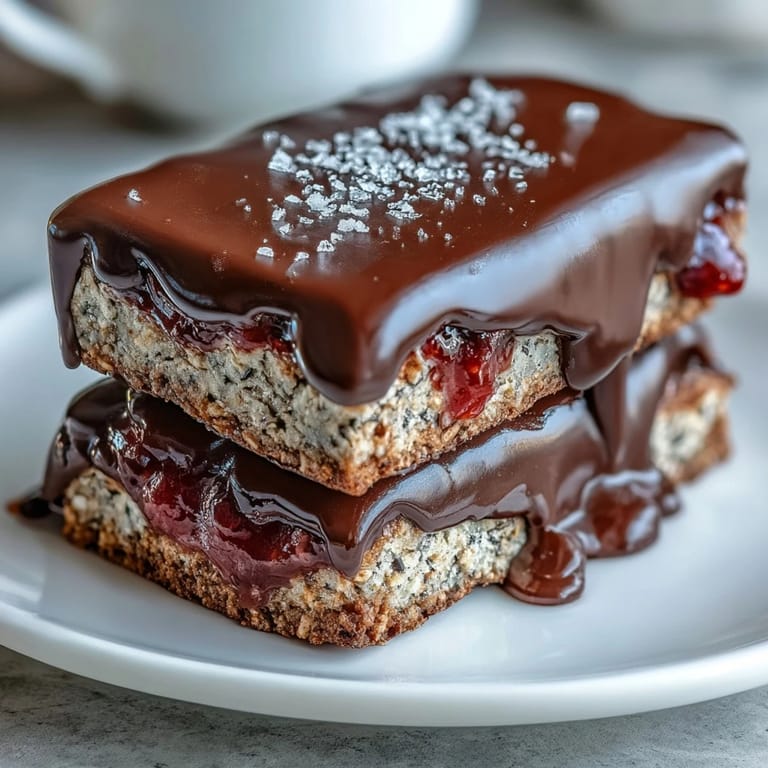
 There's a moment after these bars set, when you first slice into them and see those perfect layers, where you feel like you've accomplished something real in the kitchen. That's when they stop being just a snack and become proof that simple ingredients, treated with care, turn into something genuinely worth sharing.
Storage and Make-Ahead Wisdom
These bars live beautifully in the refrigerator for up to a week, which is perfect for meal prep minded people or anyone who likes having something sweet on hand without the guilt of daily baking. The chocolate stays set, the oats stay chewy, and if anything, they taste even better the next day once all the flavors have settled and gotten cozy with each other. If you want to store them longer, they freeze exceptionally well for up to three weeks—just layer them between parchment paper and keep them in an airtight container so they don't pick up freezer smell.
Flavor Variations Worth Trying
Once you've mastered the basic version, the beauty of this recipe is how customizable it is depending on what's in your pantry or what you're craving. I've played around with raspberry jam mixed with a bit of lemon zest, replaced the chocolate with white chocolate and crushed pistachios, and even tried a maple-cinnamon version that turned into my favorite for fall. The structure stays the same, but the flavor possibilities are genuinely endless, and there's something fun about having a base recipe you can dress up depending on your mood.
Tips for Perfect Bars Every Time
The biggest game-changer I've discovered is pressing your oat layers with something flat and heavy rather than just your hands—a measuring cup bottom or even a small skillet works—because it creates that satisfying density that makes the bars hold together when you cut them. Temperature control matters too; if your kitchen is hot, do the mixing and layering quickly and get these into the fridge as soon as possible so the chocolate sets properly. One last thing that sounds silly but works: let your knife run under hot water and wipe it between cuts, and you'll get clean, professional-looking bars instead of crumby ones.
- Use natural nut butter without added oils, or your base might slide around during layering.
- If you're nut-free, sunflower seed butter and oat flour work beautifully as direct substitutes.
- Don't skimp on the chilling time—at least two hours ensures everything sets firmly enough to slice without falling apart.
 Pin It
 These bars are proof that the best kitchen moments often come from the simplest recipes, the ones that let you focus on technique and flavor instead of complicated instructions. Make them for yourself, make them for people you care about, and watch how a little treat can become someone's favorite memory.
Recipe FAQs
- → What can I use instead of peanut butter?
Almond butter or sunflower seed butter work well as alternatives, especially for nut-free variations.
- → How should I store the bars?
Keep bars refrigerated for up to one week or freeze them to extend freshness.
- → Can I substitute the strawberry preserves?
Yes, raspberry or apricot preserves make tasty substitutes while maintaining a fruity layer.
- → Is this dessert suitable for vegetarians?
Yes, the bars use vegetarian-friendly ingredients, but check chocolate choices for vegan suitability.
- → How long do I chill the bars before serving?
Allow at least 2 hours of refrigeration to let the bars set firmly for easy slicing and serving.