 Pin It
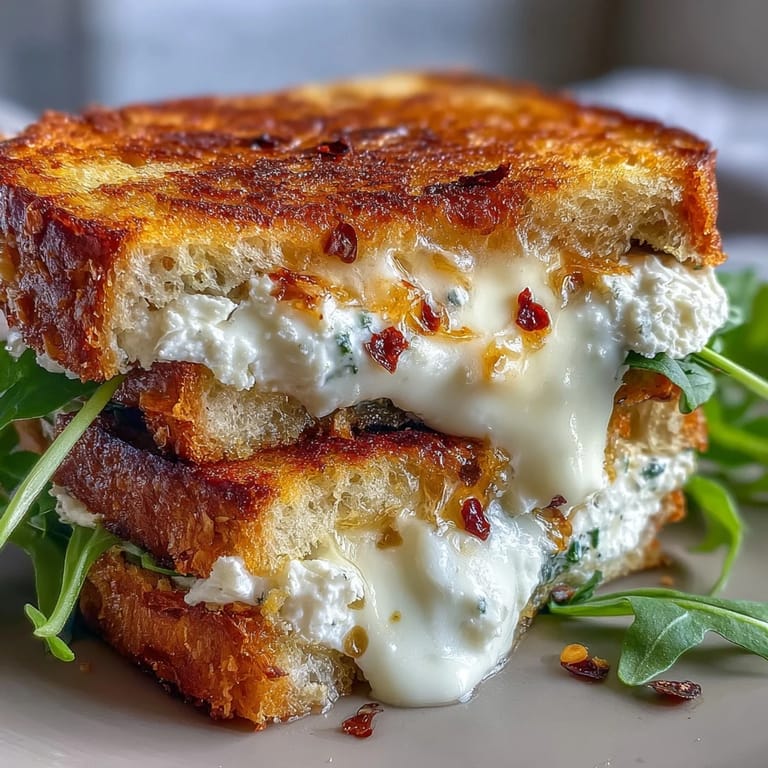
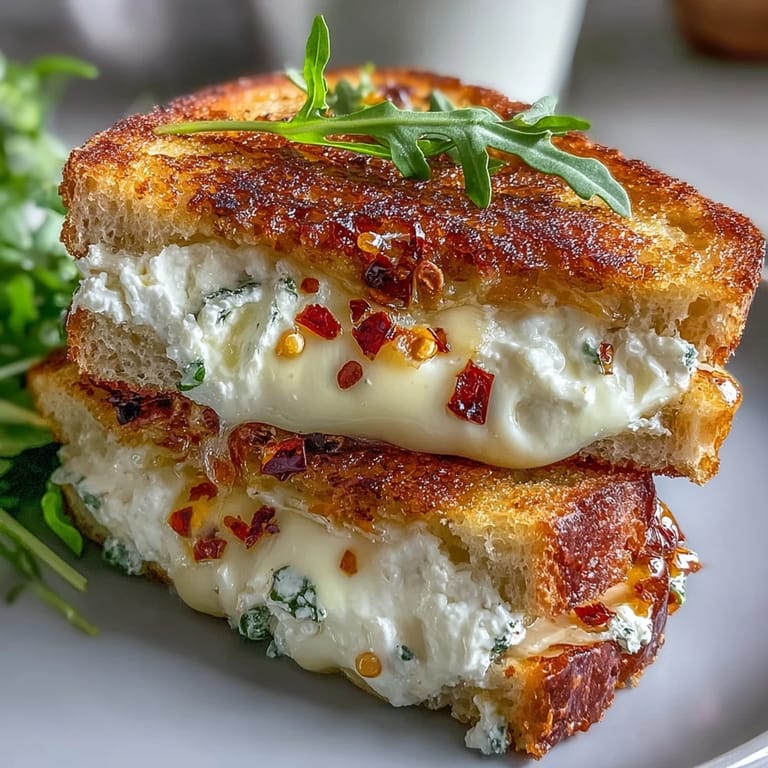
 The skillet was already hot when I realized I'd bought goat cheese instead of cheddar. Rather than run back to the store, I spread the tangy chèvre on sourdough, drizzled honey over it on a whim, and tossed on chili flakes from the spice drawer. That first bite—creamy, sweet, spicy, crisp—turned my shopping mistake into my new favorite lunch. Now I keep goat cheese stocked just for this sandwich.
I made this for a friend who swore she hated goat cheese. She took one cautious bite, then another, then asked for the recipe before she'd even finished her half. The honey softens the tang, the chili flakes wake everything up, and the butter-crisped bread holds it all together like edible architecture. She texts me photos every time she makes it now, each one with a different fruit tucked inside.
Ingredients
- Soft goat cheese (chèvre): Bring it to room temperature so it spreads easily and blends smooth with the cream cheese.
- Cream cheese: Optional but worth it—it mellows the goat cheese tang and makes the filling silky and spreadable.
- Sourdough bread: Sturdy enough to hold the filling without getting soggy, and it crisps beautifully in butter.
- Unsalted butter: Softened butter spreads evenly and creates that golden, crackling crust we're after.
- Honey: Use a mild, runny honey so it mixes smoothly and drizzles easily at the end.
- Crushed red chili flakes: Start with less if you're heat-shy, you can always add more but you can't take it back.
- Olive oil: A small swirl in the pan adds extra crispness and a hint of fruity flavor.
- Fresh thyme or rosemary: A whisper of herbs brings an earthy note that plays beautifully with honey and cheese.
- Lemon zest: Just a bit brightens the whole filling and cuts through the richness.
- Baby arugula or spinach: Adds a peppery crunch and makes you feel like you're eating something almost virtuous.
- Sliced pear, apple, or figs: Thin slices bring sweetness and a delicate texture that pairs perfectly with tangy cheese.
Tired of Takeout? 🥡
Get 10 meals you can make faster than delivery arrives. Seriously.
One email. No spam. Unsubscribe anytime.
Instructions
- Mix the cheese filling:
- In a small bowl, mash goat cheese and cream cheese with a fork until smooth and creamy. Stir in honey, chili flakes, salt, pepper, and any herbs or lemon zest, then taste and tweak until the balance feels right.
- Prep the bread:
- Lay out four slices of sourdough and spread softened butter on one side of each slice. Flip two slices and spread the cheese mixture on the unbuttered sides, then layer on fruit or greens if you like, and drizzle with extra honey.
- Assemble the sandwiches:
- Top each cheese-covered slice with a plain slice, buttered side facing out. Press gently so everything sticks together.
- Heat the skillet:
- Preheat a nonstick or cast-iron skillet over medium heat for a few minutes. Swirl in olive oil if you want extra crispness.
- Toast the sandwiches:
- Place sandwiches in the skillet, buttered sides down, and cook for three to five minutes per side, pressing gently with a spatula. Lower the heat if the bread browns too fast before the cheese softens.
- Rest and serve:
- Transfer sandwiches to a cutting board and let them rest for a minute or two. Slice in half, drizzle with honey, sprinkle with chili flakes and black pepper, and serve while the bread is still crackling.
 Pin It
 The first time I served this at a casual lunch, everyone went quiet for a moment, then someone said it tasted like a grilled cheese grew up and got interesting. That's exactly what it is—familiar comfort with just enough edge to keep you coming back. It's become my go-to when I want to impress without actually trying that hard.
Choosing Your Bread
Sourdough is my top pick because the slight tang echoes the goat cheese and the crust crisps like a dream. Country bread or a hearty white works too, just make sure it's thick enough to hold the filling without falling apart. Avoid soft sandwich bread—it gets soggy and can't support the weight of the cheese and honey.
Balancing Sweet and Heat
Start with two tablespoons of honey and half a teaspoon of chili flakes, then taste the filling before you spread it. If you like it sweeter, add more honey; if you want more kick, sprinkle in extra flakes. The beauty of this sandwich is that you can dial the sweet-spicy balance exactly where you want it.
Serving and Pairing Ideas
This sandwich pairs beautifully with a simple green salad dressed in lemon vinaigrette, or a bowl of creamy tomato soup for dipping. A handful of pickled vegetables on the side cuts through the richness and adds a bright, tangy crunch. It's rich enough to be the star of lunch but light enough that you won't feel weighed down afterward.
- Serve with a crisp white wine or sparkling water with lemon for a light, refreshing contrast.
- Add a handful of toasted walnuts or pecans to the filling for extra crunch and nutty depth.
- Make extra cheese mixture and keep it in the fridge for up to three days, ready to spread on toast or crackers.
 Pin It
 This sandwich reminds me that sometimes the best recipes come from happy accidents and a willingness to try something new. Keep goat cheese, honey, and chili flakes on hand, and you'll always be one skillet away from something delicious.
Recipe FAQs
- → Can I make the cheese filling ahead of time?
Yes, prepare the cheese mixture up to 2 days in advance and store it in an airtight container in the refrigerator. Bring it to room temperature before spreading for easier application.
- → What type of bread works best?
Sourdough or sturdy country bread performs exceptionally well due to its dense structure and ability to hold up under heat. Look for slices cut at least half-inch thick to prevent sogginess.
- → How can I reduce the spice level?
Start with one-eighth teaspoon of chili flakes and taste the filling before assembling. You can also omit the flakes entirely and serve them on the side for those who prefer heat.
- → Can I add other ingredients?
Thinly sliced pears, apples, or fresh figs complement the flavors beautifully. Fresh arugula or spinach adds a peppery bite, while caramelized onions bring sweetness.
- → Why is resting time important?
Allowing the sandwiches to rest for 1-2 minutes after cooking helps the cheese set slightly, making them easier to slice cleanly and preventing the filling from oozing out immediately.
- → Can I cook these differently?
A panini press works wonderfully for even cooking and attractive grill marks. You can also bake them at 400°F for 10-12 minutes, flipping halfway through.